Table of Contents
Photoshop is one powerful software that makes it possible to achieve significant post-photo adjustments and enhancements. Unfortunately, most of these adjustments are not possible with ordinary camera lenses.
Photoshop can surely help you tweak lighting, color contrast, perspective, or add various effects to the photo. But the most used photoshop tool is usually the blur tool. So if you, too, are wondering how to blur in photoshop, then this article is for you.
The blur tool in photoshop can be used professionally to create stunning images, or it can be used for personal use. However, google analysis shows that most people searching how to blur in photoshop are primarily looking for two main reasons.
Primary Reasons For Using Blur Tool

The two primary reasons for using the blur tool are given; based on them, you can determine what kind of editing you need to do to your picture:
- The first reason is to achieve background blur or shallow depth of field in an image with an object. It keeps the focus on the object you want to highlight, and the rest of all the components are blurred out. Most commonly, it can bring the portrait effect to the photos.
- The second reason you may be willing to learn how to blur in photoshop is the selective blur. As the name suggests, selective blur is used to blur a selective part of the image. It can be used to hide sensitive information from photos.
If you don’t have the proper camera setup, it can be pretty impossible to achieve a natural background blur effect through your camera lens. In such a case, if you know how to blur in photoshop, you can replicate the natural background blur using photoshop.
Whereas, say you want to blur a number plate from a photo of your car or blur someone’s face from a group photo; selective blur can do just the exact thing while keeping the rest of the photo unblurred.
Photoshop is advanced software, and thus it comes with a wide range of tools to work on your images with fine details. It’s easy to learn how to blur in photoshop, but it can take a while to master it. To achieve the desired blur effect, we need to use different blur tools.
Photoshop currently offers 14 different blur tools, and each tool is effective in its particular use case. For now, we will be focusing on Iris Blur for background blur and Gaussian Blur to blur selected parts of an image.
First, let’s learn how to blur in photoshop using iris blur to achieve a shallow depth of field, separating the main object from the background.
Background Blur Using Iris Blur Tool

Iris blur is the best tool to achieve background blur when we want a human object to focus. As the name says, the iris blur focuses on the subject’s eyes to achieve this blur. By adjusting the shape of the ellipse, you can focus on the subject’s eyes or even the whole subject.
Learning how to blur in photoshop using iris blur can be overwhelming if you are not familiar with the software. Here are the ten quick and easy steps to blur the background using Iris Blur.
- Open the image you want to work on in photoshop.
- Without changing any settings, head to the “Filter” menu, and under the sub-menu “Blur,” select the desired blur tool. Here we are going to select “Iris Blur.”
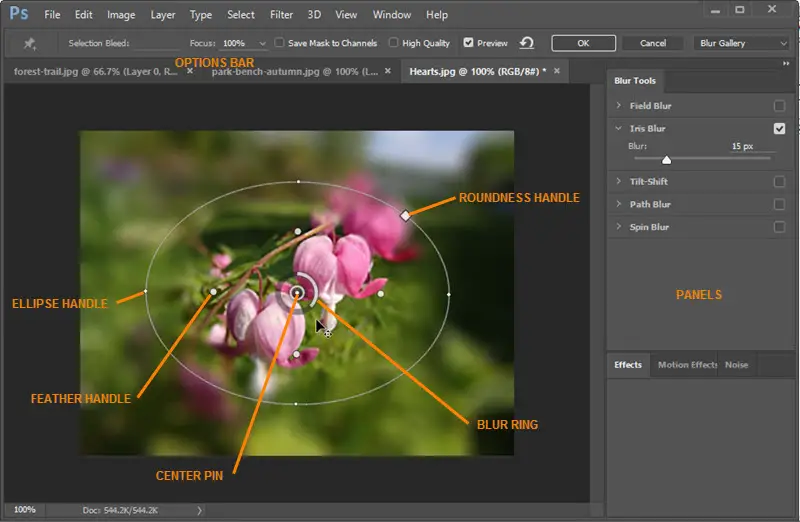
- Upon selecting the iris blur, you will notice that a center pin in the form of a ring surrounded by two concentric ellipses has appeared on the screen.
- Click and drag the center pin at the subject’s center, known as a focal point.
- The outer ellipse controls the blur area, whereas the inner ellipse controls the blur transition area, also known as feathering.
- Hold the Alt key and drag each point of the inner ellipse on the edges of your subject.
- Similarly, you can drag points of the outer ellipse to cover the entire image where the blur effect will be applied.
- Using the dial on the center pin, you can adjust the strength of the blur.
- When you are done with your adjustments, press the Enter key to deselect the blur tool.
- You can also click on multiple areas of the subject to place the iris tool and repeat the above steps to bring your subject in focus precisely.
The iris blur tool is easy for beginners to learn how to blur in photoshop as it does not require any selection, masks, or layers. However, more complex tools use layers and masks to blur the image more accurately, especially around the edges.
Our next objective is to learn how to blur in photoshop using a gaussian blur tool.
Selective Blur Using Gaussian Blur Tool

Using a gaussian blur tool to blur your image will give a hazy look to your image. This tool offers better control over blur than the iris blur. It can be used to blur the entire image or just the specific part.
Moreover, you can blur particular objects in just a few easy steps on the most superficial level. Thus, learning how to blur in photoshop can be easy if you use gaussian blur. However, the gaussian blur tool also allows you to apply a more gradual blur with some additional steps.
To blur the entire image, you can select Gaussian blur by heading to Filter and choosing Gaussian blur under the blur menu. It will apply blur to the entire image. To adjust the strength of the blur, play around with the radius field.
But if you want to blur just a selected area of your image, you will require a few more steps. Additionally, there are two ways you can blur selective parts, one with hard edges and the other one with soft edges, which blend with the rest of the image.
Achieving selective blur without soft transition is relatively easy and requires no expertise. Whereas selective blur with soft transition is comparatively more complex.
Soft transition is not required if you want to blur out some text, numbers, logos, or any similar kind of marks. However, here’s how to achieve selective blur without soft transition.
Selective Blur Without Soft Transition
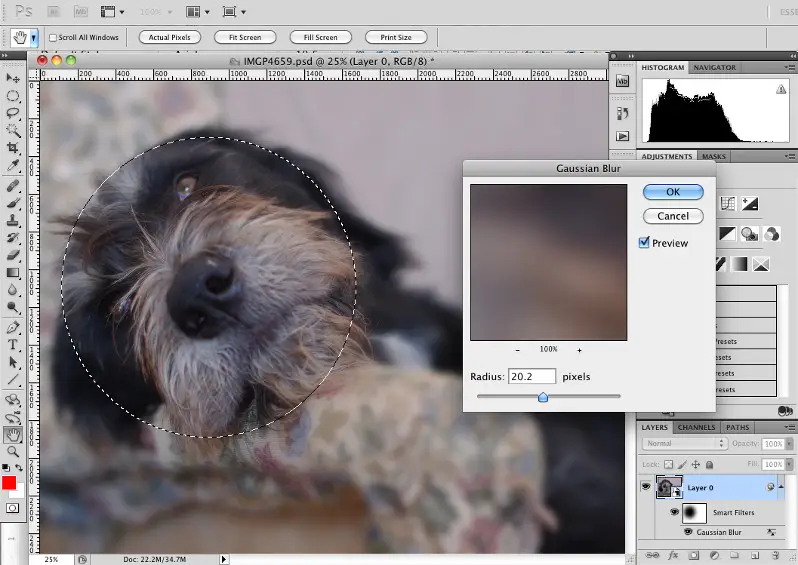
- On the side panel, choose the required selection tool and select the area to apply the blur effect.
- Then go to FIlter and select Gaussian blur under the blurs.
- It will apply blur to the selected area, adjust the radius to change the strength of the blur, and hit Enter key when done.
As we can see, a hard-line appears around the selected area due to the lack of soft transition between the blurred region and the actual image. If you want to eliminate that line and want a more gradual transformation, follow the steps given below.
Selective Blur With Soft Transition
- Right-click on the image and select “Duplicate Layer” to create a duplicate layer on which we will be working.
- Now select the duplicate layer created.
- Select Gaussian blur and adjust the radius as per your requirement.
- Now hold the Alt key and press the “Add Vector Mask” icon to add a layer mask on the duplicate layer.
- Now select the “Brush” with soft edge and hardness set to 0%.
- Choose the foreground color of brush to white and paint the areas you want blurred.
- All the painted areas will now appear to be blurred with soft edges.
For the beginner level, once you learn how to blur in photoshop using iris and gaussian blur, you will be able to edit and add basic blurs to the images. These two blur tools are enough to get your basic word done in most cases.
However, once you get more and more familiar with the software and want better control over your picture, the other blur tools will be helpful. As I mentioned before, there are a total of 14 different kinds of blurs that photoshop offers.
If you are interested in how to blur in photoshop using the other filters, here’s a brief introduction to all 14 kinds of blurs.
Types Of Blur In Photoshop

The different blurs don’t necessarily mean a different kind of blur effect. These options provide means of applying blur in various use cases, and some offer a different set of control than the other.
We will now see the purpose of these options and how to blur using these different tools in photoshop. So let’s begin in the same order as they appear in photoshop.
- Average
The average blur does a brilliant job of blurring out the selected area. It finds out the average color of the selected area and then applies blur with that color patch. So, for example, if you want to blur a boat from the image of the sea, it will blur the object by applying pixels of average color in the periphery, a patch of blue pixels in this case.
- Blur
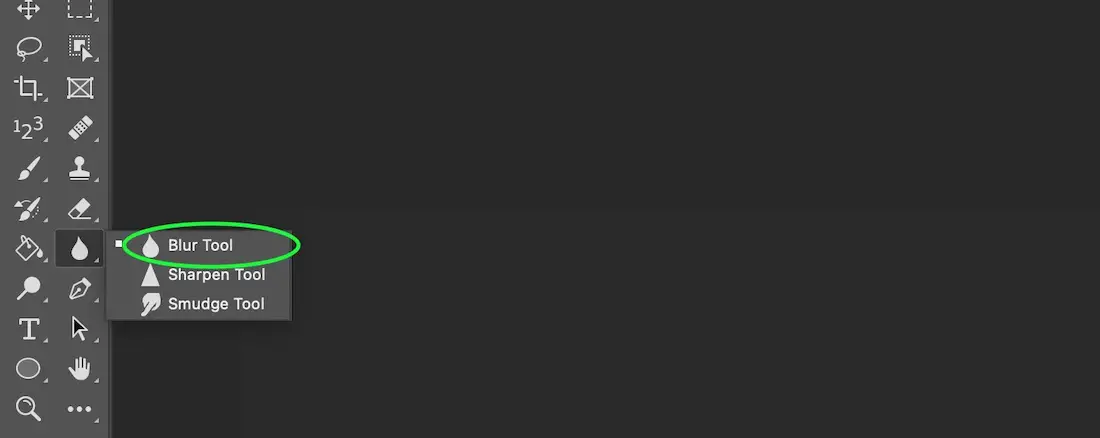
Blur tool does a simple job of creating a blur with smooth edges. If you are working on an image with sharp color differences, this tool will blur you with smooth transitions in colors around the selected region.
- Blur More
Blur more is used to increase the blur strength. Every time you click on ‘blur more,’ it will increase the blur by 3x to 4x. This filter is useful when working on high-resolution images.
- Box Blur
The box blur works similarly to the usual blur but offers better control when working with two different high contrast colors.
- Gaussian Blur
As we have already seen, gaussian blur gives a hazy look to the whole image or a selected part of it.
- Lens Blur
As per its name, Lens blur does what a fast camera lens would have done. It helps to get a shallow depth of field around the subject and blurs the background.
- Motion Blur
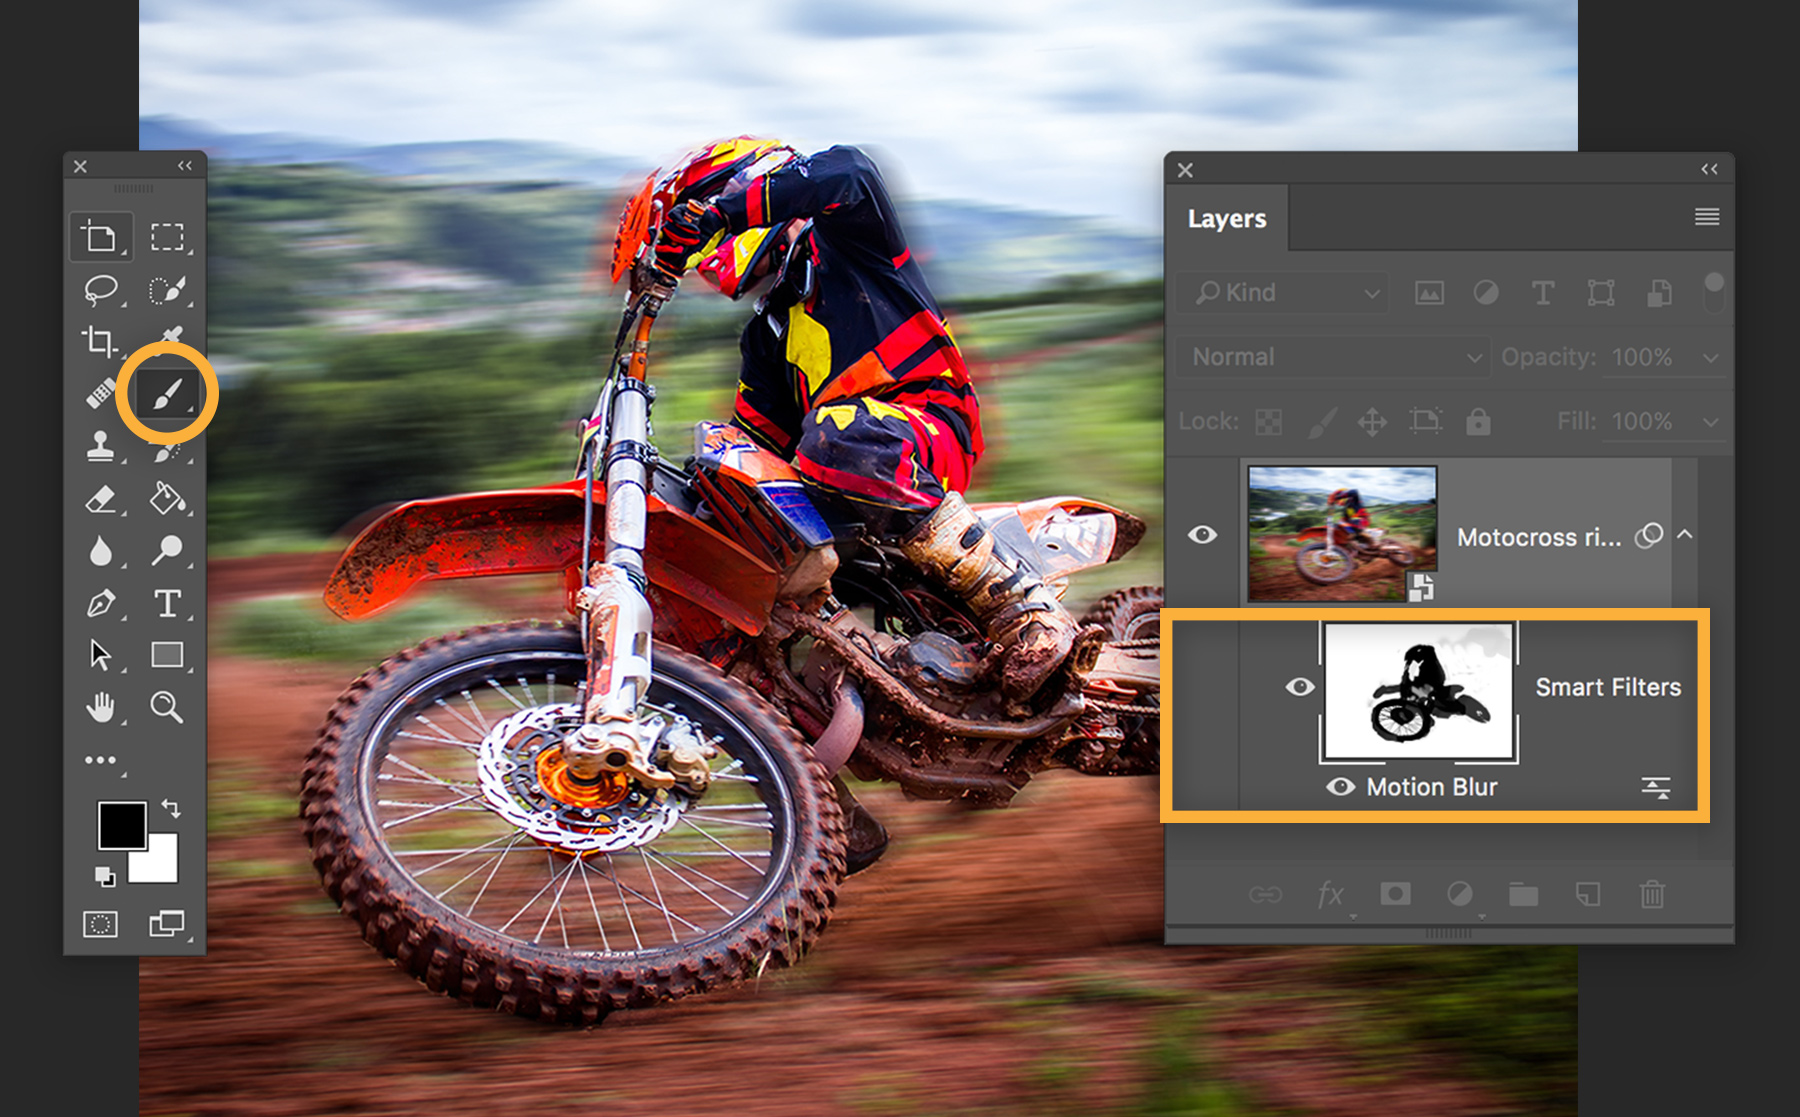
Usually, motion blur pictures are often clicked using a camera, but if you have a photo without motion blur with you, this tool has got you covered. It creates a motion effect similar to the one in the camera by adding blur in a specific manner in the direction of movement.
- Radial Blur
This filter will create an effect as if you are zooming in with your camera. It keeps the center subject in focus while applying a blur to the rest of the image in a circular manner.
- Shape Blur
As the name suggests, Shape blur is applied to distinct shapes present in an image.
- Smart Blur
Bright blur is designed to reduce the noise present in the image in post-photo editing. It analyses the image and smartly eliminates grain present to make it look smoother.
- Surface Blur
Similar to intelligent blur, this filter helps in reducing noise present in the image. Additionally, this filter blurs the entire image except for the edges.
- Field Blur
Field blur is mainly used to add depth of field to the flat images. It can be used multiple times for multiple subjects present in an image.
- Iris Blur
We have already seen how an iris blur works. The purpose of this filter is to blur selected parts of an image, and it is most preferred on human subjects.
- Tilt-shift
Tilt-shift can be used to make your photos look like macro shots. It creates more linear blur than iris blur.
Conclusion | How to blur in photoshop
This article is a one-stop guide for beginners who want to learn how to blur in photoshop. It mainly focuses on two main types of a blur “Iris Blur” and “Gaussian Blur.” One can get basic edits done using these two filters.
Follow the above steps and experiment a little to familiarize yourself with this software. You can also check out the other blur filters if you are looking for a specific effect.
If you have any doubts about any of these tutorials, please drop them in the comment box given below. In the meantime, check out our other articles on photoshop to master new skills.


