Table of Contents
There are certain times when we need to curve a text in PowerPoint. This could be to get a shape like giving some special artistic effects to the text or to shape it in a specific circle in PowerPoint. No matter what the case is, it is crucial to know how to curve text in PowerPoint.
To do the task of how to curve text in PowerPoint, you will have to go through the following steps:
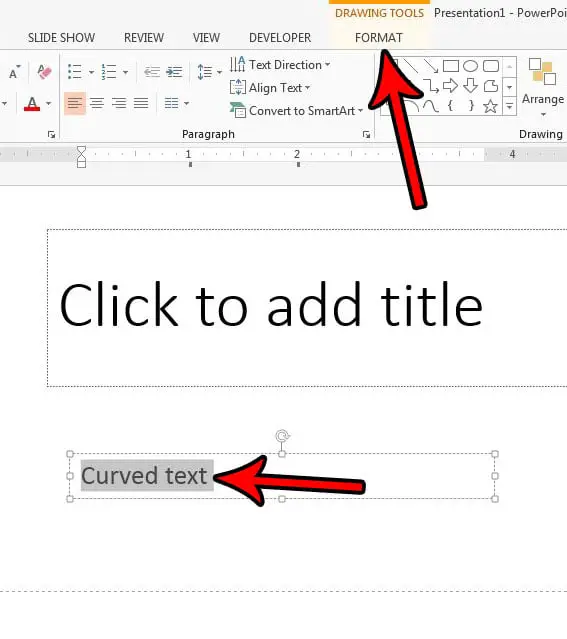
- First of all, you need to select the specific text in the text box.
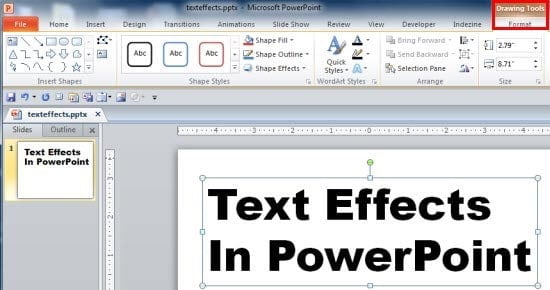
- After that, click on the tab displaying “Format”.
- Then, just click on the option showing “Text Effects” under the section “WordArt Styles”.
- From the dropdown menu, you need to click on “Transform” and select one of the “Follow Path” options given as per your need.
Now you need to think exactly which option to select, as this can vary based on the intended outcome. So, in this article, we will discuss with you about what you have to do to complete the task of how to curve text in PowerPoint. So, let’s take a look.
The method of how to curve text in PowerPoint

Although the steps that you need to follow while doing the task of how to curve text in PowerPoint have been mentioned in the introduction part, we will take a close look at the entire process in detail in this section.
The process of how to curve text in PowerPoint is really simple. The steps are mentioned below:
- Selecting the box
Firstly, you need to carefully select the text box that contains the specific text, which you want to curve.
- 2. Add the transform effect
Then, you need to apply the effect of curve text.
To accomplish that, just click on the “Format” tab. After that, just click on the option showing “Text effects”. You will then see a dropdown menu with different options.
Next, click on the “Transform” button, after which another side menu bar will display with several other options that will help you to transform the text.
Now, you can choose the style that you want to apply. Although you can select from one of those several options, It is better, to go with either the “Arch Up” or “Arch Down” options.
- Increase the size of the box
After adding the effect to the specific text in the text box, you will be able to see that the text now looks curved. However, it may not become exactly as per your need.
So now, you will have to properly adjust the size of the text box, just by dragging either the bottom or the top parts of the text box. The more squares your text box has, the better the effect of the curved text will be.
- Font size
You can now increase the font size to get a better effect on your curved text. However this step is completely optional, it is just a better way to adjust the specific text in a perfectly curved manner.
- Final tasks
The final or last step of this entire process of how to curve text in PowerPoint would be to go for the finer adjustments. You may want to adjust the text effect size further as well as the font size in order to get the best possible output.
You can also use the option known as WordArt instead of choosing a normal text to give a more artistic look to your text.
Now, we will learn about how to curve text in PowerPoint, around a circular shape. However, before that, if you are thinking about how to implement the curved effect in one of those older versions of PowerPoint, here are some steps to help you out.
Method of How to Curve Text in PowerPoint 2010
To complete the process of how to curve text in PowerPoint 2010, just select the text carefully. Next, click on the “Format” option. Then, you need to click on the option showing “Text Effects”. After that, from the dropdown menu, click on the option showing “Transform”, and lastly, click on the “Arch Up” or “Arch Down” option from the “Follow Path” section as per your requirement.
The process of how to curve text in PowerPoint is the same for the versions PowerPoint 2016, PowerPoint 2010, PowerPoint 2013, PowerPoint 2019, and also Office 365.

The method of how to curve text in PowerPoint for Mac users
The method of how to curve text in PowerPoint on Mac doesn’t actually vary as such. However, the steps are below.
To do the process of how to curve text in PowerPoint on Mac, just select the text. Next, you need to click on the tab showing “Shape Format”. After that, click on the option “Text Effects”. From the dropdown menu, just click on the “Transform” option. Lastly, you need to click on “Arch Up” or “Arch Down” effects from the section showing “Follow Path”.
The process of how to curve text in a circle in PowerPoint

Now you are aware of the process of how to curve text in PowerPoint. However, if you want to curve text around a circular shape, then you may have noticed that it is also a very easy task.
So, here are the steps to help you out.
- Increase the size of the text box
First, start working with the text.
Select the text box, and then try to increase the size of the text box to turn into a perfect square. You can’t drag a side of the text box to do this task.
So, to turn the text box into a perfect square, you need to click on the “Format” tab. After that, carefully adjust the height of the text box to match the width. Keep in mind to make sure that both the values are actually the same. You can also enter the values manually to edit those.
- Add the new text effect
Next, add the newly transformed text effect.
Here, in the tab showing “Shape Format”, just click on the option “Text Effects”. From the dropdown menu, click on the option “Transform“, and select the “Circle” effect option from the section “Follow Path”.
- Increase the size of the font
You will now see that the text is curved. But it has not turned into a full circle. To curve that in a circle, remember to increase the font size.
As there is no perfect size for everyone, you will need to go for a trial and error method to select the perfect font size for your text.
- Set the Arch length
After increasing the font size and curving the text into a circular shape, you can easily adjust the starting point of the text just by changing the “Arc Length”.
For this, simply click on “arc rotation handle” shown by the “yellow” dot, and then carefully drag it in any one direction.
- Finishing task
The last step is to go for some fine-tuning. Move the text around a circular shape that is already present on a slide to have a nice effect.
Then, you can change the size of the text by either changing the box size or just by changing the font size.
Lastly, you can change the color of the text to match the overall design of your slide!
Conclusion
So, all the above-mentioned steps of how to curve text in PowerPoint will be able to help you a lot if you want to give some special look to your texts.
Using PowerPoint can be tricky at times. Those who use on a regular basis might be aware of all the features, but for occasional users, several features and functions may appear to be difficult to handle. If you want to cite pictures in PowerPoint and need help with that, you can try this blog on How To Cite Pictures In PowerPoint In 5 Different Devices.

