Table of Contents
Did you know that mechanical pencils were invented before wooden pencils? Before individuals deduced how to make wood-cased pencils, refillable lead holders were the world’s first pencils. After five centuries of refinement and innovation, the world has a fantastic selection of fun and functional mechanical pencils.
This guide to mechanical pencils will cover the fundamentals of mechanical pencils, like how to use them, why you should use them, and how to troubleshoot the most common mechanical pencil issues.
A guide to mechanical pencils: What is a Mechanical Pencil?
Mechanical pencils (also known as automatic or propelling pencils) are reusable holders with a mechanism for extending the lead—typically a push button. Mechanical pencil leads are available in various sizes, the most common being 0.5 and 0.7 mm. Some mechanical pencils have 2 mm or wider leads, usually called “lead holders.”
Different names know mechanical pencils in different places and people. In the United Kingdom, the terms ‘automatic pencil’ and ‘propelling pencil’ are fairly common, and people may also refer to ‘clicky pencils.’ Technical drawing pencils may be referred to as drafting pencils (or even ‘draughting pencils’ in British English) or ‘technical pencils.’ However, these terms have also been applied to traditional clutch pencils.
‘Pen pencil’ and ‘lead pencil’ is used in India, and ‘pacer’ is used as a generic term by some people, despite being the name of an old Paper Mate pencil. However, the mechanical pencil is the most accepted version of these pencils.
A guide to mechanical pencils: History of Mechanical Pencils
The first pencils resembled modern clutch pencils rather than what we consider “normal” wooden pencils. Graphite was first used in lumps, possibly with a piece of cloth wrapped around it to keep it in place. When things began to move toward the pencil, the first attempts involved using wooden holders to grip graphite sticks. Conrad Gessner was the first to describe a lead holder in 1565.
Cleo Scribent makes a replica called Der Gessner if you want to be completely authentic. Because there is no spring mechanism, it was difficult to adjust, but the basic elements of a clutch pencil are all present.
For many years, push-fit lead with a twist mechanism that wound the lead down like a screw as it was used was the most common, and pencils were frequently decorated with ornate designs in sterling silver.
Because of the need to write intricate characters, Japan had a greater incentive to make thinner leads, which resulted in the invention of the modern mechanical pencil.
Tokuji Hayakawa created the ‘Ever-Ready Sharp Pencil,’ which was a huge success, and his company adopted the pencil’s name and became ‘Sharp,’ the electronics company we know today.
Thinner lead was impossible with the traditional graphite-clay mixture because it was too brittle. Modern thin leads are made of high-polymer organic materials that can withstand much more force without breaking and are constantly improving.
Why Should You Use a Mechanical Pencil? Guide to mechanical pencils
There are some compelling reasons to prefer a mechanical pencil over a wood-cased pencil.
- Sharpening is not required: You don’t need to keep sharpening the lead if it’s thin enough; just keep writing or drawing. It not only saves time and effort, but sharpening can be a messy process.
- Consistent line Width: A freshly sharpened wood-cased pencil writes a very thin line. The line becomes thicker and thicker as you write more. The line says the same thing with a mechanical pencil, making it a more predictable tool.
- Consistent balance: The balance of a wooden pencil changes as it grows shorter. Mechanical pencils do not change as the lead is used. It may not be significant to everyone, but it makes a significant difference for some artists.
- Refillable: You don’t discard stubs; instead, keep putting more leads in. There are no trees to be felled. If you use a mechanical pencil frequently, you could argue that it is the more environmentally friendly.
- Style and material options are available: Mechanical pencils vary greatly in appearance; some resemble technical tools, others resemble luxury items, and still, others resemble simple plastic-bodied pencils. Some even resemble wooden pencils!
Guide to mechanical pencils: The benefits of using a mechanical pencil
Mechanical pencils have several advantages over wooden pencils and pens, including:
- Reusable
- Sharpening is never required
- More consistent line widths
- More convenient to hold
- Simpler to store
- They do not change shape or balance as they are used
- Erasable
- Do not skip, bleed, or feather
- Never let a leak ruin your clothes
Moreover, while all inks eventually break down and fade, graphite lasts virtually indefinitely!
The various mechanisms of mechanical pencils
Mechanical pencils, for most, are quite simple to use; you click the button on end to feed out more lead whenever you need it. Hold the button down and gently push the lead in to retract it. When you’re out of leads, add more of the same size, usually through a hole under the button, which is often hidden beneath the eraser.
However, there are some variations and oddities. Know about the various mechanism below.
Guide to mechanical pencils – Mechanisms of Twist-Click
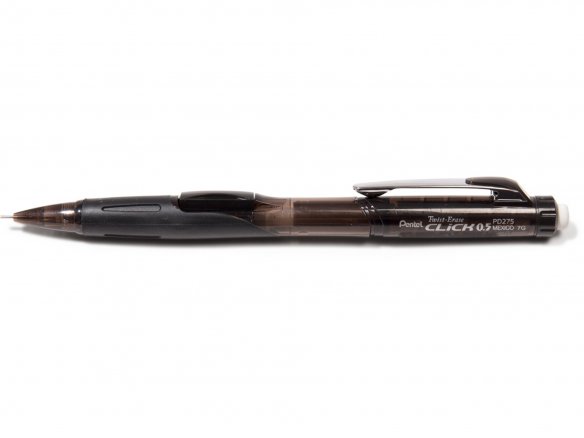
This mechanism is commonly found in pencils designed to match a matching ballpoint pen. When you twist the top of the barrel, the lead clicks forward. The top part springs back when you release, but the lead remains in place. Twist and hold to bring the lead back in. To add more leads, these typically pull open in the middle.
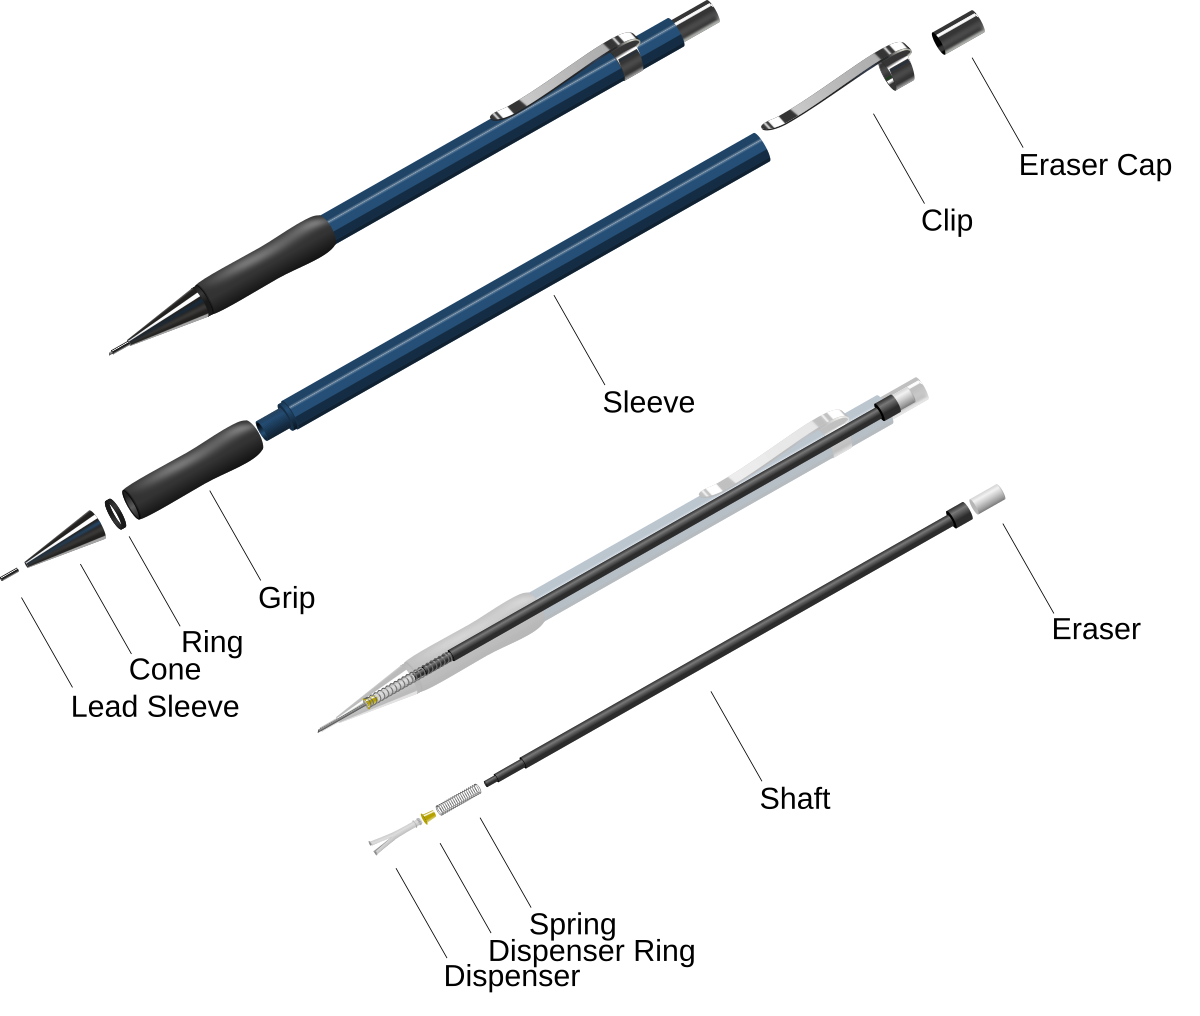
Inside, this type of pencil frequently employs an adapter, which resembles the refill for the matching ballpoint pen and contains the entire pencil mechanism and lead tube. The pencil is essentially a ballpoint pen with a pencil adapter attached. To add more leads, usually, remove the cap at the top of the adapter.
Guide to mechanical pencils – Mechanisms of Continuous Twist
These aren’t as common anymore, but there are a few around, such as Faber-e-motion. Castell’s The inside is a screw-mechanism, with the lead wound down as it is used. When you finish a lead, you take out the stub, insert a new lead into the tool, and wind it back up to the top. These may only hold one lead at a time, but they frequently have a place to store spares.
Guide to mechanical pencils – Mechanisms of Shaker
The shaking mechanism is another solution to the problem of stopping to click out more lead – give the pencil a strong shake up and down, and a weight concealed inside does the job of switching the button for you. These typically have a button in the usual location, but a quick wrist flick takes less time away from scribbling down your notes.
Guide to mechanical pencils – Auto-feed Pencils
Some pencils don’t require you to stop at all to extend more lead, at least not until you reach the rear of a stick and have to click the next one through. These functions can be a little surprising, as you must write with almost no visible lead.
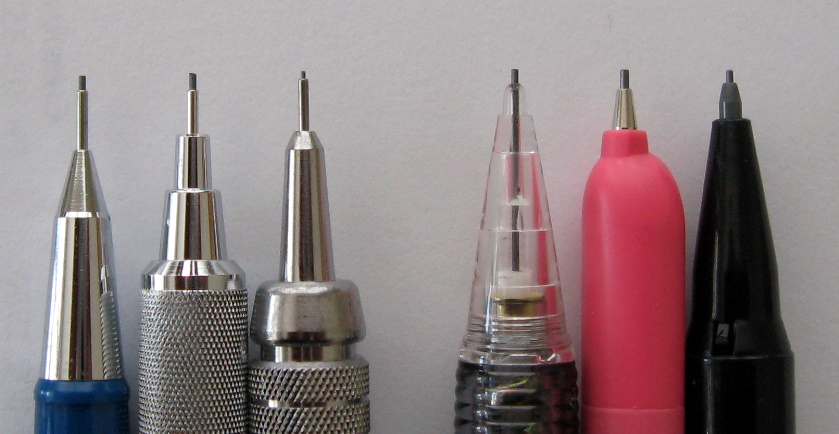
A (usually) plastic cone surrounds the lead. You’d normally have to click out more lead before it wore down enough to advance the supporting pipe or cone, but not with an auto-feed pencil. Simply continue to write or draw.
When the lead wears down to the point where the cone touches the paper, it is pushed back up a little. A spring inside pushes it back, bringing some lead with it. As a result, the lead will wear down until it reaches this cone, at which point it will stop.
The cone appears uncomfortable and scratchy to write with, but it is smooth and rounded, so it does not catch the paper. You may prefer to click lead the traditional way when you have time, but if inspiration strikes, just keep scribbling!
Guide to mechanical pencils – Sliding Lead Sleeves
It’s a fine line, but we’ll distinguish between pencils in which the sleeve that encircles the lead can glide up if pushed and pencils in which the sleeve is designed to slide up easily while writing. A few pencils now have sleeves with smooth rounded edges, so they don’t catch on the paper and slide up easily. As a result, you can continue writing as you would with an auto-feed pencil. The difference is that these pencils will not feed more lead, so you’ll have to stop and click at some point.
Guide to mechanical pencils – Kuru Toga
The Kuru Toga, arguably the most significant advancement in mechanical pencil technology in recent years, is revolutionary! The up and down activity rotates the lead as you write or draw with it.
Because pencils are typically held at an angle to the page, the lead wears down at an angle, forming a chisel-shaped tip with a sharp point. The thicker line produced by this shape and the sharp point can catch the paper. Some work around this by turning the pencil as they go, causing the lead to wear down more evenly. This is done for you by the Kuru Toga. As a result, the line is finer, and there is less lead breakage.
While it is likely to work best with Japanese characters where the pencil is raised from the paper many times for each character, it also performs well with English writing and even helps a little with a cursive script.
Guide to mechanical pencils – Erasers with a Twist
The eraser on most mechanical pencils is only for emergencies. You’d probably need a separate eraser if you needed to erase a lot. On the other hand, a few pencils have larger erasers with twisting mechanisms to extend them, allowing them to last for a long time. It’s a great feature if you frequently erase.
Using a mechanical pencil: Guide to mechanical pencils
Extending the Lead
Every mechanical pencil has an instrument that allows you to extend the lead out from the tip as it wears down. The following are the most common:
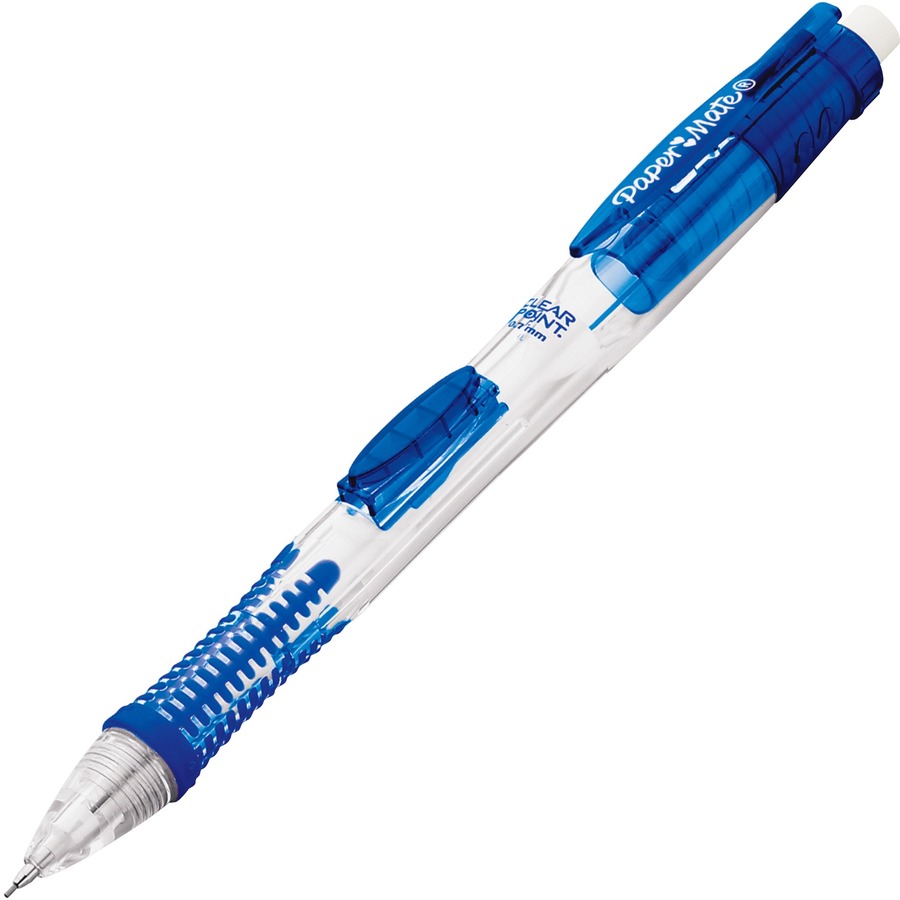
- Push Button: Most mechanical pencils have a button that extends a predetermined amount of lead each time you press it. The button is usually found at the top of the pencil (near the eraser), but some pencils have it on the side or even in the clip.
- Shaker: Some mechanical pencils have an ingenious mechanism that allows you to extend the lead by bouncing the pencil up and down. As you do, a sliding weight inside the pencil hits a button, allowing you to extend the lead. Almost every shaker pencil also has a standard push button that you can use instead.
- Twist: Some mechanical pencils, particularly those inspired by vintage designs, allow you to extend the lead by twisting the pencil’s nose cone or a knob at the top end. Twist pencils allow you to control how much lead you want to extend, but they can only hold one lead at a time.
Lead Retracement
You may need to retract the lead at times, either because you accidentally extended too much or because you are finished using the pencil and don’t want the lead to crack when you put it back in your pencil box.
Simply hold the push switch down and push the lead back into the tip of a push-button or mechanical shaker pencil.
Rotate the top knob or nose cone of a mechanical pencil in the opposite direction that you twist it to extend the lead. Some twist pencils will retract the lead, but others will require you to push the lead back into the tip after rotating.
Refilling the Lead
Whether now or sometime late, all the lead in your pencil will be used up, and you will need to refill it.
- Picking the Right Leads
The most important thing is that the leads you use to refill the pencil are the same size as the leads that came with it. Many pencils have the lead size printed directly on them, and we include the lead size required by all of our pencils in their product names. When you try to extend too narrow leads, they will simply fall out of the pencil tip. If you use too wide leads, they will get clogged inside the pencil.
The next thing to think about is lead grade. The most common grade is HB, which corresponds to an American #2 pencil. We recommend using a B or 2B lead if you want something a little darker and smoother.
The last thing to think about is the brand of the lead. The lead brand has a much smaller impact on your writing experience than lead size and grade, but it does matter.
- Setting up the Lead
Step One: Most mechanical pencils with push buttons are refilled in the same way:
Step Two: Remove the top cap or press the button. It could be a cap that protects the eraser, a piece of plastic attached to it, or the eraser itself.
Step Three: Pull out the eraser if the top push button was a cap covering the eraser.
Step Four: Insert 3-5 leads into the pencil’s body. Do not fill the pencil with all the leads as that will fit as it’s tempting, but you’ll land up getting a lead jam.
Step Five: Replace the eraser and/or the top push button. Press the push-button until the new lead emerges.
Some mechanical pencils require you to remove a larger section of the top of the pencil. It is most common with shaker pencils, twist-erase pencils, and other pencils where the entire top section of the pencil serves as the push button.
In contrast, to push button pencils, most Twist mechanical pencils are refilled through the tip:
Step One: Remove any remaining old lead from the pencil’s tip.
Step Two: Insert the new lead into the pencil’s tip.
Step Three: For some pencils, press the new lead into the pencil until you feel it securely slide into the pencil’s inner clutch mechanism.
Step Four: Retract the new lead into the pencil by twisting the pencil’s top or nose.
Making Use of the Eraser
The eraser is usually built into the top end of mechanical pencils. Often, the eraser is concealed beneath the top cap or push button, which can be removed to reveal the eraser. Some pencils feature twist erasers, which can be extended or retracted by twisting the pencil’s top end.
For changing the eraser, simply pull out the old one and insert a new one to replace most mechanical pencil erasers. Make sure to purchase the correct refill erasers for your pencil.
Lead Sleeve Retraction
Some pencils allow you to retract the lead sleeve when not in use. This keeps the lead sleeve from getting bent and keeps the lead sleeve from poking your pocket or pencil case. You can use the following steps to retract the most retractable lead sleeves.
Step One: Keep your finger on the pencil’s push button.
Step Two: Press the lead sleeve tip against your finger or a hard surface.
Step Three: While pressing the tip of the lead sleeve, release the push button.
As you let go of the push button, you’ll be able to push the lead sleeve back into the pencil’s tip. The lead sleeve will pop back out automatically the next time you click the push button.
Also Read: How To Pin A Website To Taskbar – Easy Methods For You
Guide to mechanical pencils: Troubleshooting
Here are some pointers for dealing with the most common problems that arise when using a mechanical pencil.
The Lead Continues to Slid Back Into the Pencil
If the lead in the tip of the pencil keeps pushing back into the pencil when you press it down on the paper, the lead in the tip is too short and must be removed. Pull the lead from the tip and continue to press the push button until a new lid emerges. If a portion of lead inside the pencil breaks into multiple small pieces, you may need to repeat this process.
The Lead Won’t Extend
If you use the push button and the lead does not extend at all, try the following solutions:
- Check that you’re using the correct lead size for your pencil.
- Shake your pencil gently up and down while holding it straight up and down. This can help any leads stuck in the barrel that fall into the pencil’s clutch mechanism.
- Check for a lead jam in your pencil. A lead jam occurs when a piece of broken lead becomes lodged inside the pencil and prevents new lead from emerging.
The Lead Keeps Breaking When You Extend It
If the push button functions properly but the lead continues to break as you extend it, your pencil may have a partial lead jam.
If there is no lead jam, the lead sleeve of the pencil may be slightly bent. You can try to straighten it, but you’ll likely need to replace the pencil.
The Lead Keeps Breaking When You Write
If the lead keeps breaking while you’re writing, you have a few options:
- Make use of a stronger lead. Our top graphite leads pick are Pentel Ain Stein, Uni NanoDia, and Pilot Neox. Colored leads should be avoided because they are much more fragile than graphite leads.
- Use a slightly harder grade of lead.
- Make use of a larger lead size.
- Make use of a pencil with lead guarding features.
Guide to mechanical pencils: Factors to check before buying
Purchasing a mechanical pencil is simple. It can be more difficult to find the ideal mechanical pencil for you. Buying the right one for someone else may be even more difficult. The good news is that the pencils are reliable, and most are quite comfortable to use, so you’re unlikely to go wrong. However, we’re here to help.
Purpose
It’s a good idea to start by considering how you intend to use the pencil. If you’re going to use it mostly for writing, you’ll probably look for different features than someone who will use it for sketching.
-
Writing
If you’re going to write with your pencil, you’ll want lead that is thick enough not to break easily. With modern leads, 0.5mm is plenty strong for most people, but heavier-handed people may snap such thin leads, so 0.7mm or even 0.9mm leads are preferable. Some have cushioned lead, protected from damage by an internal spring.
If you frequently find yourself scribbling notes, such as lecture notes or meeting minutes, you might want to consider pencils with shaker mechanisms or side buttons that make it easier to feed more lead in a hurry. Auto-feed pencils can also be useful in keeping the lead usable.
-
Drawing
Drawing or sketching has very different requirements than writing, and it may take some experimenting to see what suits you and feels right for your style.
The thickness of the lead is critical for drawing. Rough sketching can benefit from thick leads, but for bold lines, softer grades of lead are usually used. You may also want to consider clutch pencils for this look, as there are more of them available with thicker lead. 0.5mm is the traditional size for more technical styles, but the humble 0.5mm mechanical pencil is a versatile tool many artists use for various styles. You may consider 0.3mm leads for a detailed drawing.
Features
Mechanical pencils can have a surprising number of features. If you think there are too many features to consider when deciding which pencil to buy, imagine how difficult it is for someone who has to write an article about them!
Here are some features to look for when purchasing a mechanical pencil.
-
Mechanisms
The traditional mechanism for feeding lead is a button opposite the tip that pushes the lead forward one ‘click’ at a time. There’s a complicated set of parts inside to make it all work, but it’s all so tried and tested that it works very reliably, and even the most basic mechanical pencil can usually last for years.
So, why might you think about other mechanisms? Side-mounted buttons, shaker mechanisms, and auto-feed mechanisms, for example, can all feed lead more quickly. It’s not critical for most people, but if you have to keep up with lecture notes or take minutes in meetings, the time it takes to click out more leads could be enough to put you behind.
They’re all based on a very similar mechanism to the push-button clutch, so they’re usually very dependable.
-
Erasers
The eraser is found on the majority of mechanical pencils. They are extremely important to some people while being completely irrelevant to others. If you rarely erase, you’re probably unconcerned about the eraser. On the other hand, people who frequently erase may not care because they have a favorite eraser and are happy to carry it separately. Those in the middle who care about the eraser should consider the built-in eraser’s size and replaceability. They can always be replaced, but make sure the replacements are available.
-
Thickness of lead
This is a great way to limit your options if you know what thickness of lead you want to use. Many pencils are only obtainable in one size, so if you know you need 0.9mm lead, it’s pointless to look at 0.5mm pencils. Many more technical pencils are available in various widths, most commonly 0.5mm, 0.7mm, and 0.9mm, with some adding 0.3mm or 2mm to the range.
Your usage and your personal preference determine the thickness you desire. If your writing is small or detailed drawings, a thinner lead is required. You’ll need thicker lead if you’re a heavy-handed person. Because 2mm leads are similar in width to the core of a standard wooden pencil, you’ll need to sharpen them for most purposes.
Guide to mechanical pencils: Obtaining Lead for Antique Mechanical Pencils
Mechanical pencils from the early to mid-twentieth century were typically made with 0.9 mm or 1.1 mm leads. It’s worth noting that 1.1 mm leads are also 1.15 mm and 1.18 mm, but they’re all interchangeable. Similarly, 1.0 mm leads and 0.9 mm leads are commonly interchangeable. Inserting a bent paper clip into the tip of a pencil can help you determine the size of lead it uses. A standard jumbo (1 3/4″) paperclip fits perfectly into a 1.1 mm pencil tip, and a standard no.1 (1 3/8″) paper clip fits perfectly into a 0.9 mm pencil tip.
Mechanical pencils made recently may use any lead size, but the most common are 0.5 mm and 0.7 mm. If you have both lead sizes, we recommend testing the 0.5 mm leads first because putting 0.5 mm leads into a 0.7 mm pencil is less likely to cause issues than putting 0.7 mm leads into a 0.5 mm pencil.
Takeaway
Mechanical pencils are a very important part of modern-day life. Be it your office work or study you will require them greatly. Hope this guide to mechanical pencil works for you and you get all the answers desired.


